Android2023. 5. 19. 15:18


 API레벨    
 롤리팝  5.0  21
 롤리팝  5.1   22 
 마시멜로  6.0   23 
 마시멜로   6.1   23 
 누가   7.0 ,7.1   24 , 25
 오레오  8.0,8.1   26,27 
파이 9.0 28
Android 10(퀸스타르트) 10 29
Android 11(레드벨벳케이크) 11 30
Android 12(스노우콘) 12 31
Android 13(티라미수) 13 33
Android 14(업사이드다운케이크) 14 34
Posted by 비니미니파파
Python2023. 5. 19. 15:11

python schedule 을 이용한 프로그램 시작과 종료

import schedule
import time

current_time = time.strftime("%Y-%m-%d %H:%M:%S", time.localtime())
# print(current_time)

def start_program():
    print(current_time)
    print("프로그램이 시작되었습니다.")

def end_program():
    print(current_time)
    print("프로그램이 종료되었습니다.")

# 시작 시간과 종료 시간 설정
start_time = "15:05"  # 시작시간
end_time = "15:06"  # 종료시간

# 스케줄링된 작업 추가
schedule.every().day.at(start_time).do(start_program)  # 시작 시간에 프로그램 시작 작업 추가
schedule.every().day.at(end_time).do(end_program)  # 종료 시간에 프로그램 종료 작업 추가

# 무한루프를 돌며 스케줄링된 작업 실행
while True:
    schedule.run_pending()
    time.sleep(1)


내가 안짰음...

chatgpt 가 짜줌 ^^


Posted by 비니미니파파
Python2023. 4. 4. 14:47


import time

from datetime import datetime

while True:

    # 현재 시간 출력 YYYY-MM-DD HH:MI:SS 
    s = datetime.now().strftime('%Y-%m-%d %H:%M:%S')

    print(s)

    # 1초간 sleep
    time.sleep(1)


python 시간 포맷을 알아보려면 아래 사이트를 방문 하자!

https://docs.python.org/3/library/datetime.html


datetime — Basic date and time types

Source code: Lib/datetime.py The datetime module supplies classes for manipulating dates and times. While date and time arithmetic is supported, the focus of the implementation is on efficient attr...

docs.python.org


Posted by 비니미니파파

https://nodejs.org/download/release/v10.24.1/


Index of /download/release/v10.24.1/


nodejs.org


NodeJs 버전은 10.x.x 사용

node-gyp 은 6.1.0 사용

~]# npm install -g node-gyp@6.1.0

끝!!!


Posted by 비니미니파파
Raspberry Pi2022. 12. 20. 10:09

 table header 를 html thead tr 사용 하지 않고 정의 하기

<table id="example" class="display" style="width:100%">
    <thead>
    </thead>
</table>


<script>

$('#example').DataTable( {
  columns: [
	{"data":"mdate","title":"날짜"},
	{"data":"username","title":"이름"},
	{"data":"tel","title":"연락처"}
  ]
} );

</script>


Posted by 비니미니파파

npm 으로 원하는 버전 설치하기 중요 

node-gyp 을 원하는 버전 6.1.0으로 설치하고자 할때는

node-gyp@version 형식으로 설치 하면 된다. 

~]# npm install -g node-gyp@6.1.0

버전 확인

~]# node-gyp -v
v6.1.0
Posted by 비니미니파파

Nodejs 홈페이지에서 원하는 릴리즈를 찾아서 다운받으면된다.

https://nodejs.org/ko/download/releases/


이전 릴리스 | Node.js

Node.js® is a JavaScript runtime built on Chrome's V8 JavaScript engine.

nodejs.org

다운 받은 nodejs 를 원하는 폴더에 압축을 풀고

예) /usr/local/node/

path 를 추가 하자.

~]# export PATH=$PATH:/usr/local/node/bin/

시스템에 등록하고 싶을 때는

~/.bash_profie 에 스크립트를 추가하면 된다. ( ~ 리눅스에서 사용자 홈디렉토리 이다.)

마지막줄에 추가

~]# vi ~/.bash_profie

-- 마지막 줄에 추가 --
export PATH=$PATH:/usr/local/node/bin/

node 명령어를 실행해 보면 잘된다.

*** npm 으로 원하는 버전 설치하기 중요 ***

node-gyp 을 원하는 버전으로 설치하고자 할때는 @버전 형식으로 설치 하면 된다. 

~]# npm install -g node-gyp@6.1.0


끝!!!

Posted by 비니미니파파
Server(Windows&Linux)2022. 5. 10. 09:18

현재 path 확인

~]# echo $PATH

또는

~]# env

경로를 추가해 보자

추가를 원하는 경로 /home/test/bin/

~]# export PATH=$PATH:/home/test/bin/

echo $PATH 나 env 로 확인하면 추가된 경로를 확인할 수 있다.

Posted by 비니미니파파
PHP2022. 2. 15. 14:00

head.php 를 보면

 
<?php echo outlogin('theme/basic'); // 외부 로그인?>
 

로 되어있다.

반응형 테마를 사용 중이라면 아래 폴더에서 skin 파일을 찾는다.

/g5/theme/테마명/mobile/skin/outlogin/basic

스킨파일을 찾았다면 수정해주자. 

$uri= $_SERVER['REQUEST_URI'];

$login_msg = '로그인';
if (preg_match('/en/i', $uri)) $login_msg = 'Login';
else $login_msg = '로그인';

예) 영문사이트 경로는 ~/en/~ 형태여야 한다.

Posted by 비니미니파파
Python2021. 11. 10. 10:52

1에서 10까지 값 만들기

import numpy as np

# 1~10까지 만들기
a = np.arange(1,11)

print(a)

결과 : [1, 2, 3, 4, 5, 6, 7, 8, 9, 10]

만들어진 1~10까지 더하기 : 누적합(Cumulative Sum) : np.cumsum

# 1~10까지 더하기
b = np.cumsum(a)

print(b)

결과 : [ 1 3 6 10 15 21 28 36 45 55]

* 수학 공식

( 첫번째 값 + 마지막 값 ) * 갯수 / 2 

(1+10) * 10 / 2 = 55

Posted by 비니미니파파
Python2021. 11. 3. 16:04

def 함수명(파라미터1, 파라미터2 ....)

# sum 함수 선언
def sum(x,y):
    return x+y

# sum 함수 호출
sum(3,4)


간단하죠 ^^

Posted by 비니미니파파
Python2021. 11. 3. 15:55
import matplotlib.pyplot as plt  
import numpy as np

# 선그래프
plt.plot([1,2,3,4])
plt.xlabel('x-axis')
plt.ylabel('y-axis')
plt.show()

# 선모양
x = np.arange(0., 10., 0.3) # 0에서 10미만 0.3 증가
y = x**2                    # x의 2 제곱
line = plt.plot(x, y)
plt.setp(line, color='r', linewidth=3.0)  # 선모양
plt.show()

Posted by 비니미니파파

먼저 nodejs 가 설치되어 있어야 한다.

프로젝트 디렉토리를 생성 한다. ( 예 : pjtest )

visual studio code 를 실행 후 폴더를 연다.

nodejs 나 electron 개발 시 visual studio code 가 좀 더 편한거 같다.

터미널을 연다.

터미널에서

~> npm init
This utility will walk you through creating a package.json file.
It only covers the most common items, and tries to guess sensible defaults.

See `npm help init` for definitive documentation on these fields
and exactly what they do.

Use `npm install <pkg>` afterwards to install a package and
save it as a dependency in the package.json file.

Press ^C at any time to quit.
package name: (pjtest)
version: (1.0.0)
description: Test Project
entry point: (index.js)
test command: start
git repository:
keywords:
author:
license: (ISC) MIT
About to write to C:\dev\vstudio\workspace\pjTest\package.json:
{
  "name": "pjtest",
  "version": "1.0.0",
  "description": "Test Project",
  "main": "index.js",
  "scripts": {
    "test": "start"
  },
  "author": "",
  "license": "MIT"
}


Is this OK? (yes) y

package.json 이 생성되었으면 반은 성공
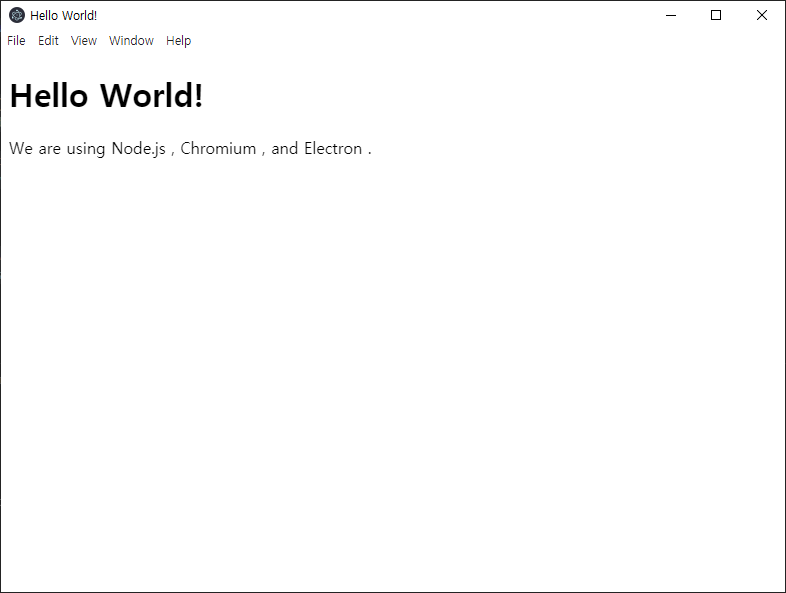
일렉트론을 설치해 보자

~> npm install --save-dev electron

added 87 packages, and audited 88 packages in 21s

6 packages are looking for funding
  run `npm fund` for details

found 0 vulnerabilities

설치완료 스타트(start) 스크립트 설정

package.json 을 열고 script 부분을 아래와 같이 변경한다.

  "scripts": {
    "start": "electron ."
  },

{
  "name": "pjtest",
  "version": "1.0.0",
  "description": "Test Project",
  "main": "index.js",
  "scripts": {
    "start": "electron ."
  },
  "author": "",
  "license": "MIT",
  "devDependencies": {
    "electron": "^13.1.9"
  }
}

설정은 끝났다. 실행할 파일을 만든다. ( index.js , main.html )

index.js

const { app, BrowserWindow } = require('electron')
const path = require('path')

function createWindow() {
    const mainWindow = new BrowserWindow({
        width: 800,
        height: 600
    })

    mainWindow.loadFile('main.html')

}

app.whenReady().then(() => {
    createWindow()

    app.on('activate', function () {
        if (BrowserWindow.getAllWindows().length === 0) createWindow()
    })
})

app.on('window-all-closed', function () {
    if (process.platform !== 'darwin') app.quit()
})

main.html 을 만든다.

<!DOCTYPE html>
<html>
  <head>
    <meta charset="UTF-8">
    <!-- https://developer.mozilla.org/en-US/docs/Web/HTTP/CSP -->
    <meta http-equiv="Content-Security-Policy" content="default-src 'self'; script-src 'self'">
    <meta http-equiv="X-Content-Security-Policy" content="default-src 'self'; script-src 'self'">
    <title>Hello World!</title>
  </head>
  <body>
    <h1>Hello World!</h1>
    We are using Node.js <span id="node-version"></span>,
    Chromium <span id="chrome-version"></span>,
    and Electron <span id="electron-version"></span>.
  </body>
</html>

터미널에서 실행해 본다.

~> npm start


끝...

자세한 공부는 아래에서 하자.

https://www.electronjs.org/docs/tutorial/quick-start

Posted by 비니미니파파
Python2021. 8. 5. 17:53

시작일~종료일 까지 반복 하는 Python 코드

datetime, timedelta


from datetime import datetime, timedelta

# 시작일,종료일 설정
start = "2021-08-01"
last = "2021-08-04"

# 시작일, 종료일 datetime 으로 변환
start_date = datetime.strptime(start, "%Y-%m-%d")
last_date = datetime.strptime(last, "%Y-%m-%d")

# 종료일 까지 반복
while start_date <= last_date:
    dates = start_date.strftime("%Y-%m-%d")
    print(dates)

    # 하루 더하기
    start_date += timedelta(days=1)


Posted by 비니미니파파